Part 4: Installing Linux (Basic)

Alright. You’ve made it this far. You downloaded the ISO, and you flashed the USB, and you booted up that USB, and you rode the Hasselhoff! Now it’s finally time to install Bazzite.
- Good news: This part is actually the easiest.
- Bad news: If you mess this up, you will erase your entire life. So read carefully!
Try Before you Install
This is actually really easy. If you’ve got commitment issues (valid) or just want to mess around before installing anything, you can boot into Bazzite’s live mode and test it out.
- When you boot up the drive Click “Test this media & install Bazzite” in the boot menu
- It loads a full desktop you can play with safely
- Nothing saves BUT you can’t break your system no matter what you click
Basic Installer Walkthrough
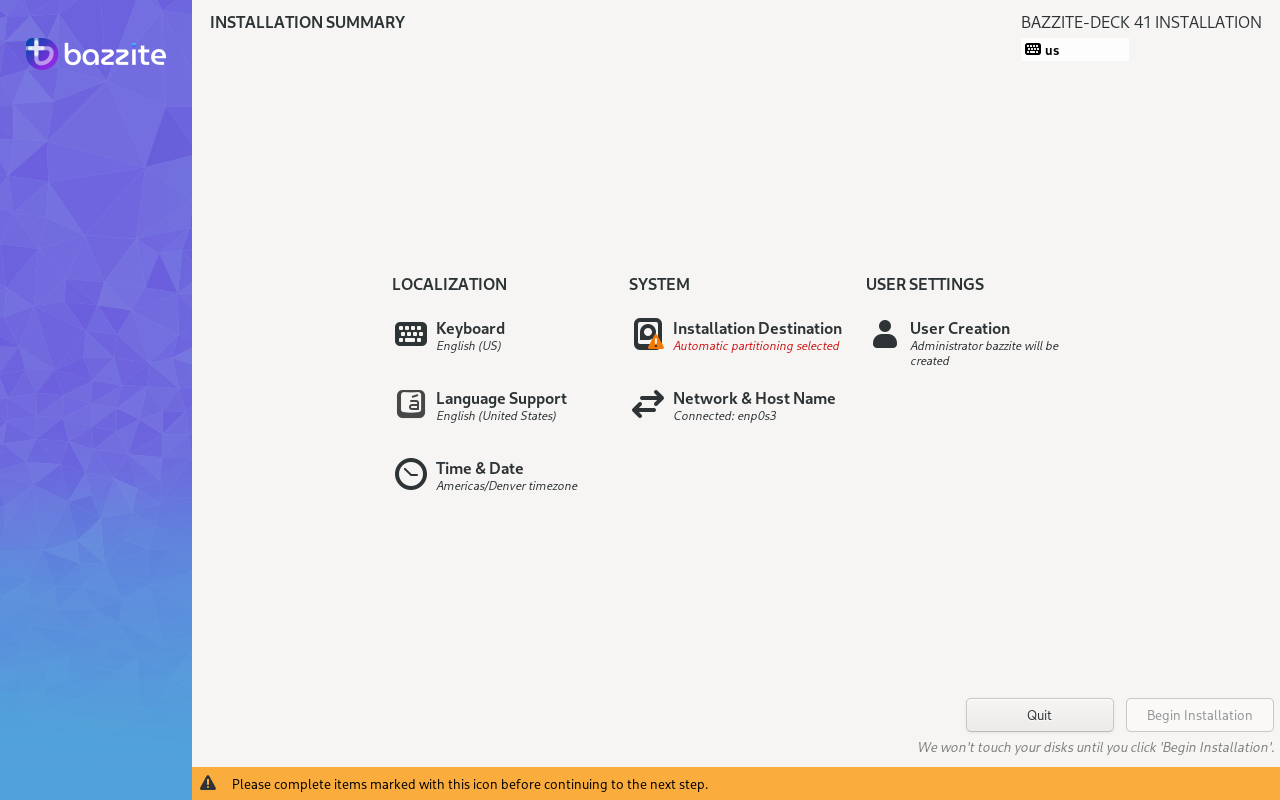
This is for anyone who wants to wipe Windows, wipe their sins, wipe everything, and start completely fresh. Once you reach the boot menu and choose Install Bazzite, you’ll be dropped into the installer. It looks fancy, but it’s basically just a form with a few extra steps. You should see something like this:
• Pick Your Language
English, Elvish, Ancient Sumerian, R'lyehian, whatever you get it.
• Pick Your Timezone
Bazzite needs to know whether to look down on you for waking up at 2PM.
• Pick Your Keyboard Layout
If you use Dvorak, this is where I look down on you.
• Connect to WiFi (If You Aren’t Already)
Some machines auto-connect from the live session. If yours doesn’t, now’s the time. Yes, the installer needs internet: it pulls packages, firmware, and other Linux magic.
• Choose Installation Destination
This is the big moment. Choose the drive where Bazzite will live. You’ll see a list of all your drives, and the ones you select will get a check mark. If you pick the drive with Windows on it, that means Windows will need to be wiped. Poof. Make sure your backups are done, and your emotional support is secured. Then proceed.
• User Creation
This is where you make you.
Choose your username, your display name, and then:
- Create your password (yes, you need one, it’s Linux)
- Confirm password (because fat-fingering is real)
- Check the box for administrator privileges so you can actually do things like install apps or fix mistakes
• Network Services & Defaults
The installer may ask about enabling network time, hostname, or other tiny details. Leave them on the defaults unless you’re doing something advanced. Linux nerds customize this. Normal people don’t.
• Let the Installer Do Its Thing
Click “Install” and chill, Get tea, Stretch, Touch grass, find the Gods. No partitioning rituals or command-line sacrifices required.
• Reboot Into Your New Life
When it tells you to remove the USB, REMOVE the USB.
Otherwise it’ll just boot the boot drive again and confuse the hell out of you.
Then boom! Welcome to Bazzite Linux!
Common Problems (Basic Install)
• “The installer says no disks were found”
Cause: Rare storage controller weirdness.
Fix: Reboot and make sure BIOS is set to AHCI mode, not RAID.
• “My drive isn’t selectable / it’s greyed out”
Cause: The installer thinks your drive is in use.
Fix: Close any apps/files opened in the live session. Worst case, reboot the USB.
• “I accidentally installed to the wrong drive”
Cause: You clicked too fast.
Fix: Time travel isn’t real. Restore from backups.
• “WiFi isn’t showing up in the installer”
- Move closer to the router
- Use Ethernet if possible
- Some Realtek cards need firmware (installer will pull it once online)
• “The installer froze at 8X percent”
Cause: USB flash drive hiccup.
Fix: Reboot and run the installer again. Bad USB sticks are very common.
• “It keeps booting the USB even after installation”
Cause: You forgot to remove the USB.
Fix: Remove it when it tells you, then reboot normally.
• “My keyboard layout is wrong after install”
Cause: You picked the wrong layout. It happens.
Fix: Change it inside Bazzite after installation. No need to reinstall.
• Try screaming.
Always optional. Always effective.

